
how to enable developer options android is usually a quick fix when you need USB debugging, want to change animation speed, or a troubleshooting app asks for developer access, but the menu feels “missing.”
The catch is that Android hides Developer options by default on most phones, and the path to turn it on varies a little by brand and Android version. If you follow generic instructions that don’t match your device, you end up tapping the wrong menu and thinking it “doesn’t work.”
This guide walks you through the standard method, common brand differences (Pixel, Samsung, OnePlus, Motorola, Xiaomi), what to do when “Build number” is grayed out, and which settings are safe versus risky.
What Developer Options actually are (and why Android hides them)
Developer options is a hidden settings panel meant for app developers and advanced troubleshooting. It includes tools like USB debugging, OEM unlocking, background process limits, and animation scales.
Android hides it because some toggles can create real problems: weaker security, unstable performance, or confusing behavior that looks like a “bug” but is just a developer setting left on.
According to Android Developers (Google) documentation on debugging and device setup, USB debugging is intended for development and advanced use, and you should enable it only when needed, then disable it afterward.
Quick steps: Enable Developer Options on most Android phones
This is the path that works on a lot of devices running relatively stock Android (Pixel, many Motorolas, many Nokias, and others).
Standard method
- Open Settings
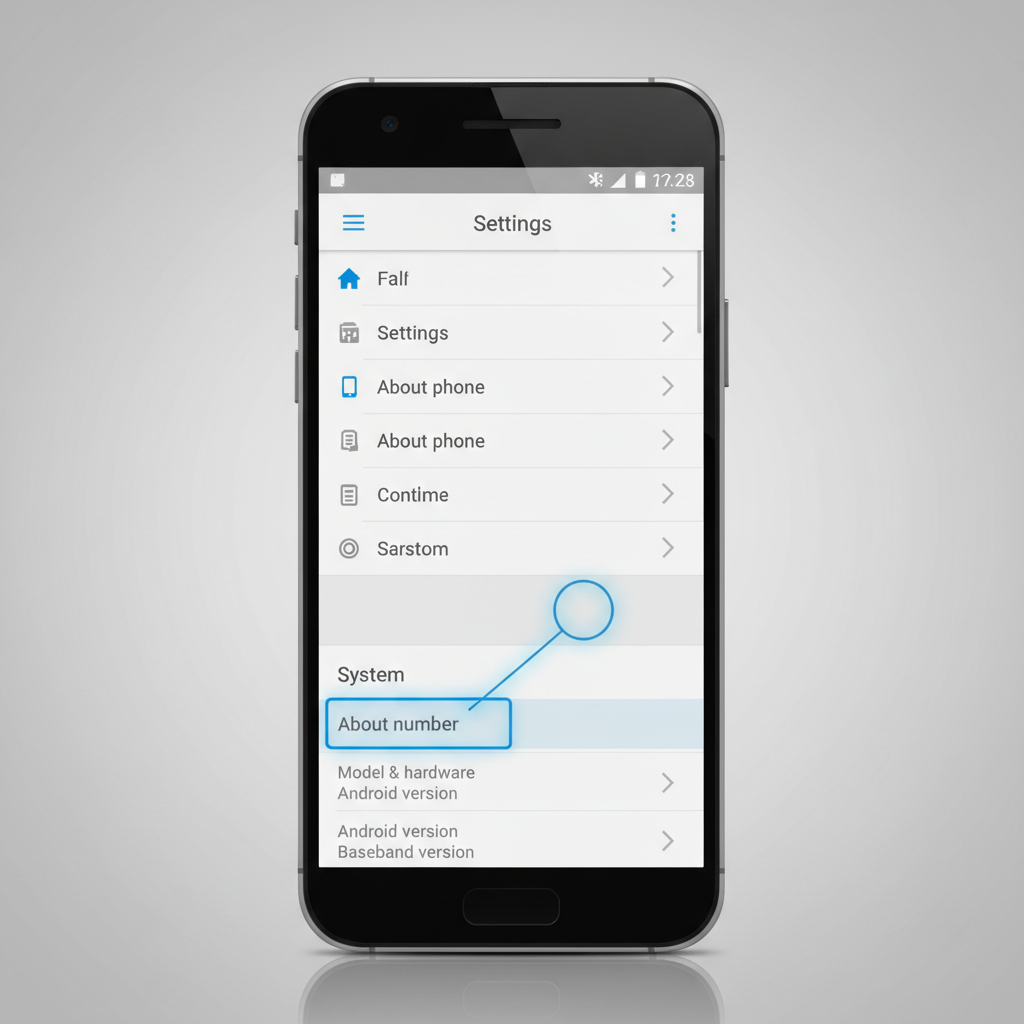
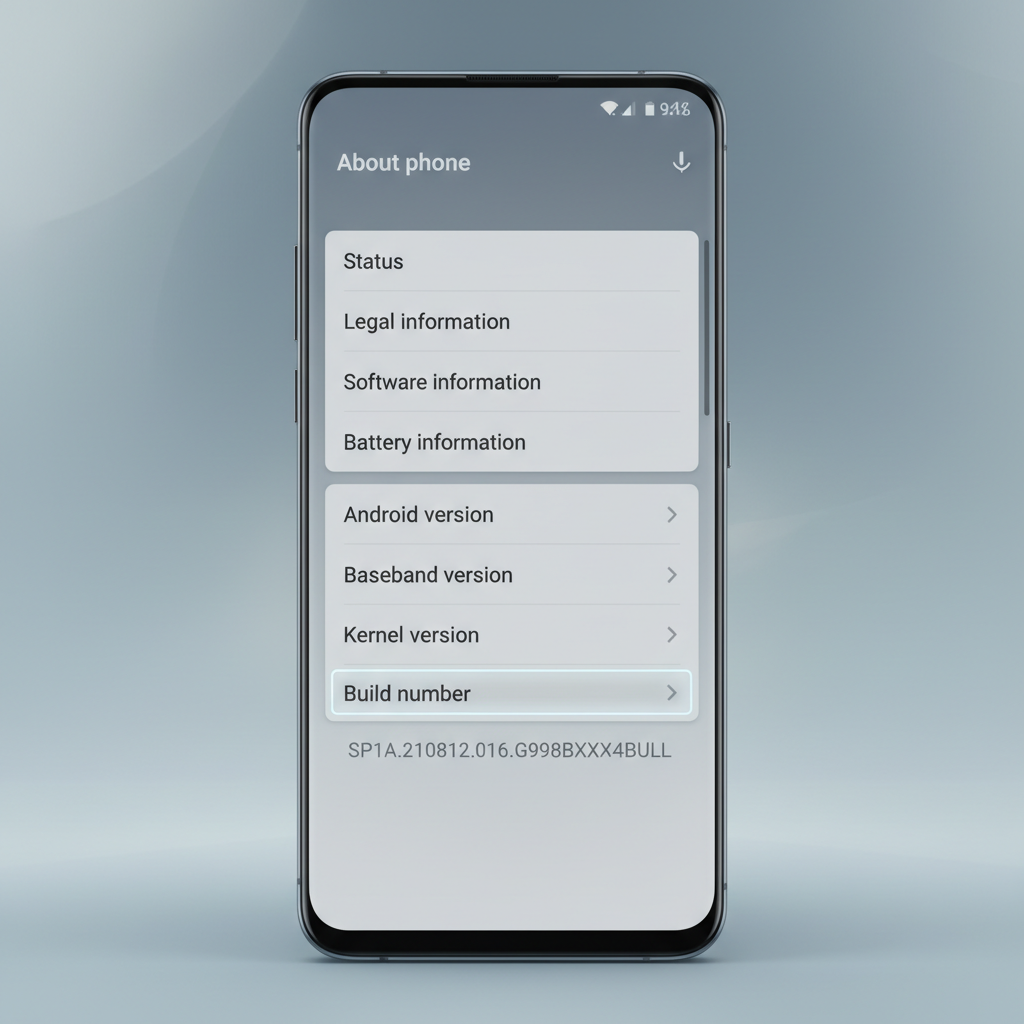
- Tap About phone (sometimes About device)
- Find Build number
- Tap Build number 7 times
- Enter your PIN/password if prompted
- You should see a message like “You are now a developer!”
After that, go back to the main Settings screen and look for System → Developer options on many phones.
Where it is on popular brands (table)
If your menus don’t match the “standard method,” use this as a quick map. Brand skins move the same items around, especially the final location of Developer options.
| Device brand | Tap path to “Build number” | Where Developer options appears after enabling |
|---|---|---|
| Google Pixel | Settings → About phone → Build number | Settings → System → Developer options |
| Samsung Galaxy | Settings → About phone → Software information → Build number | Settings → Developer options (often under Settings main list) |
| OnePlus | Settings → About device/phone → Version → Build number | Settings → System settings → Developer options |
| Motorola | Settings → About phone → Build number | Settings → System → Advanced → Developer options |
| Xiaomi/Redmi (MIUI/HyperOS) | Settings → About phone → OS version (or MIUI version) | Settings → Additional settings → Developer options |
Self-check: Why you can’t find “Build number” or it won’t enable
If how to enable developer options android feels stuck, it’s usually one of these scenarios, not “your phone doesn’t support it.”
- You’re in the wrong About screen: some phones nest it under Software information or Version.
- You must enter a screen lock: without a PIN/password set, some devices won’t allow the switch.
- Work/School device restrictions: managed devices can block Developer options via policy.
- Multiple user profiles: a restricted or child profile may not have permission.
- Search is faster: in Settings, use the search bar for “Build number” or “Developer options.”
If it’s a work-managed phone and Developer options are blocked, your IT admin may need to allow it. In many workplaces, that policy stays locked for security reasons, and pushing around it is a bad idea.
What to do after enabling: the few toggles people actually need
Most people enable the menu for one task, then never touch it again. That’s fine. Here are the common “legit reasons,” plus what each setting really changes.
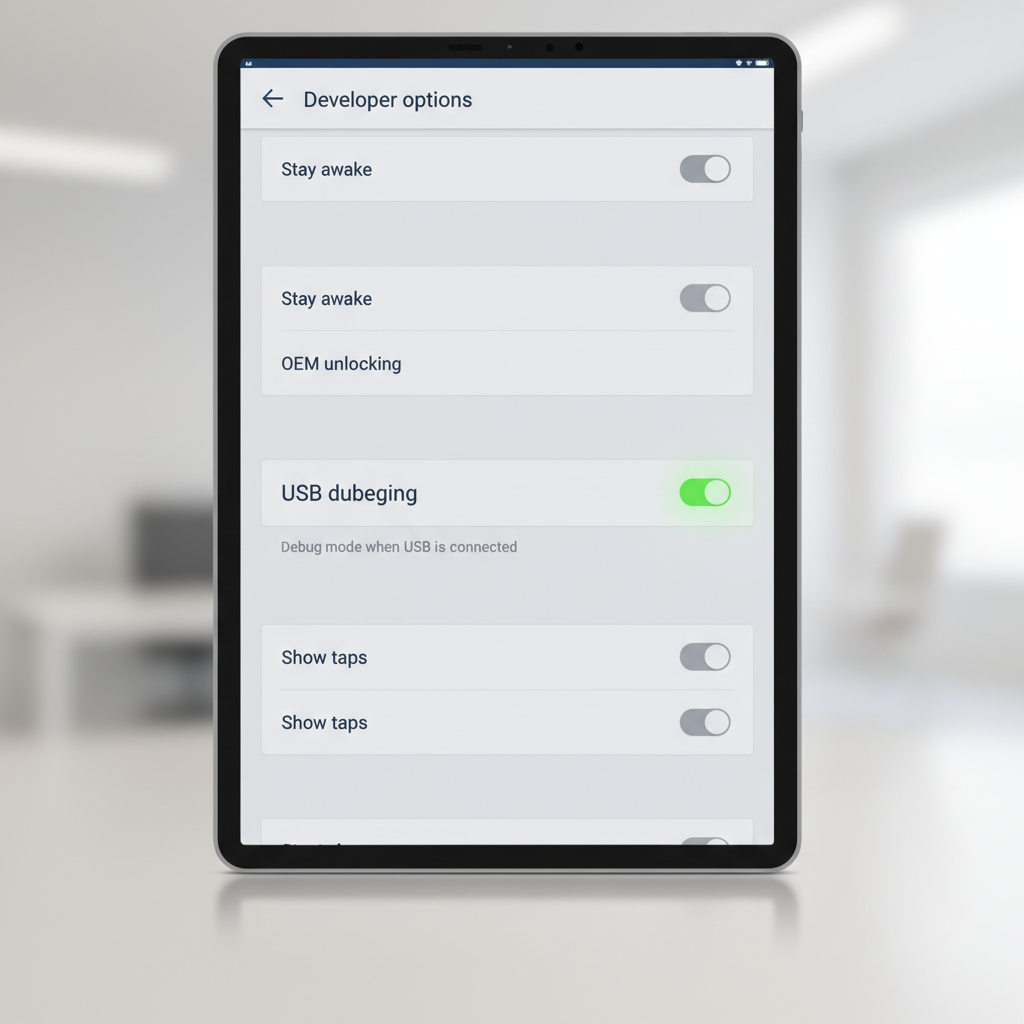
USB debugging (for Android Studio, ADB, some repair tools)
- Go to Developer options → turn on USB debugging
- When you connect to a computer, you may see an RSA prompt, choose Allow only for computers you trust
Security note: USB debugging can increase risk if someone gets physical access to your unlocked phone. If you only need it once, turn it back off.
OEM unlocking (for bootloader unlock, advanced users)
- Developer options → OEM unlocking
This can be blocked by carriers, device policies, or account requirements. It can also impact device security and warranty terms depending on manufacturer and carrier, so treat it as an advanced step.
Animation scale (for faster-feeling UI)
- Developer options → set Window animation scale, Transition animation scale, Animator duration scale to 0.5x or off
This doesn’t “speed up” hardware, it just reduces motion. If your phone feels choppy afterward, put them back to 1x.
Safe workflow: Enable it, do the task, then turn it back off
A simple routine keeps you out of trouble, especially if you’re enabling this for a one-time fix.
- Enable Developer options
- Turn on only the setting you need (often USB debugging)
- Complete your task
- Go back and turn off that setting
- If you want to be extra cautious, toggle Developer options master switch off (top of the page on many phones)
On many devices, switching Developer options off hides the menu again and resets some developer toggles, but not always every single behavior. If something feels “weird” later, it’s worth checking the page again.
Common mistakes that waste time (or cause problems)
A few patterns show up again and again, especially when people follow a random video tutorial for a different phone model.
- Tapping “Android version” instead of “Build number”: on some phones that opens a fun Easter egg, not developer access.
- Leaving USB debugging on permanently: convenient, but not a great tradeoff if you don’t use it weekly.
- Changing background process limits to “fix lag”: it often breaks notifications and multitasking more than it helps.
- Turning on “Force GPU rendering” blindly: results vary by app, and it can create visual glitches.
- Mixing up OEM unlocking with SIM unlocking: they are different, and OEM unlocking won’t unlock a carrier phone.
If you already changed a bunch of toggles and now your phone behaves oddly, the quickest sanity check is to turn the Developer options master switch off, restart, and see what improves.
When you should get help (IT, carrier, or a repair shop)
If Developer options won’t enable or key toggles are missing, it’s often not a “settings mistake,” it’s a restriction.
- Work-managed devices: ask your IT admin, policies may block debugging for security compliance.
- Carrier-locked features: OEM unlocking or bootloader actions can be disabled on some models.
- Security concerns: if you suspect your phone has been compromised, avoid enabling debugging and consider professional support.
For anything involving bootloader unlocking, rooting, or flashing firmware, you’ll want model-specific guidance. Those steps can wipe data or brick a device in some cases, so proceed only if you’re comfortable with the risk and have backups.
Key takeaways: Enabling the menu is usually just seven taps on Build number, but the menu path varies by brand, and the smartest move is enabling only what you need, then disabling it again.
If you want a quick next step, open Settings and use search for Build number, enable Developer options, then decide whether you actually need USB debugging or you were chasing the wrong fix.
FAQ
- Why can’t I find Developer options after tapping Build number seven times?
On many phones it shows under System or Additional settings. If it still doesn’t appear, check whether the device is managed by work/school policy or you’re in a restricted profile. - Is enabling Developer options safe?
Usually yes if you only enable the menu and leave most toggles untouched. Risk tends to come from enabling debugging features or changing performance limits without knowing the side effects. - Where is Build number on Samsung Galaxy phones?
Commonly it’s Settings → About phone → Software information → Build number. Samsung hides it one layer deeper than many Android skins. - Does turning off Developer options disable USB debugging?
On many devices, yes, but behavior can vary by version and manufacturer. If you want certainty, toggle USB debugging off directly before hiding the menu. - What’s the difference between OEM unlocking and unlocking my phone for another carrier?
OEM unlocking relates to the bootloader and firmware. Carrier/SIM unlocking is handled by the carrier and doesn’t require Developer options in most cases. - Can enabling Developer options void my warranty?
Enabling the menu alone typically doesn’t. Actions like unlocking the bootloader, rooting, or flashing firmware can affect warranty or support terms depending on manufacturer and carrier. - Why is OEM unlocking grayed out?
It’s often blocked by carrier policy, device management, or account/device status requirements. If it’s a work phone, your admin may have disabled it on purpose.
If you’re trying to enable developer access for a specific tool (Android Studio, ADB commands, screen mirroring, device repair software) and you’d rather not guess which toggles matter, keep your exact phone model and Android version handy, then follow a model-matched checklist so you only change what you need.