
How to stop pop up ads on pc usually comes down to two things: stopping “legit” notifications you accidentally allowed, and removing the apps or browser add-ons that keep trying to monetize you.
On Windows 11, pop-ups can come from your browser, Windows notification settings, bundled “offers” in apps, or outright adware. The tricky part is that each source needs a different fix, and doing the wrong one wastes time.
This guide helps you identify where the ads originate, then walks through practical steps for Edge and Chrome, Windows 11 notification controls, and a careful malware check without turning your PC into a science project.
Where pop-up ads on Windows 11 usually come from
Before you change settings, take 30 seconds to notice what the pop-up looks like and where it appears. That clue determines the fastest path.
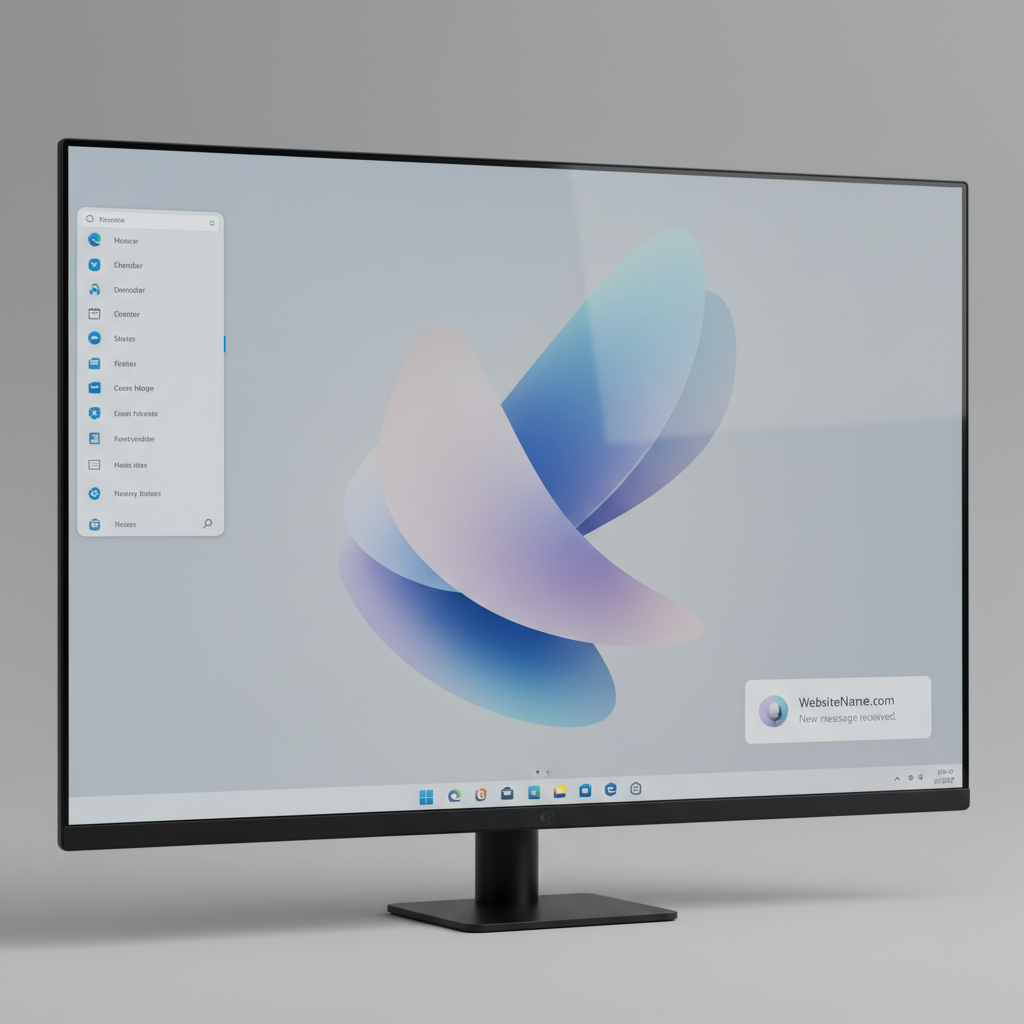
- Browser notification pop-ups: often appear in the bottom-right corner, even when the browser is closed, and show a website name.
- Website pop-ups in a tab: new tabs opening, overlays saying you “won,” or fake security alerts inside the browser window.
- Windows/app notifications: promotional toasts from installed apps, game launchers, “shopping” apps, or manufacturer utilities.
- Adware or potentially unwanted apps (PUA): persistent ads, homepage/search changes, random redirects, new toolbars.
According to Microsoft, Windows Security can help detect and remove unwanted software, and Windows also includes controls for notifications and app permissions that reduce unwanted prompts.
Quick self-check: identify your pop-up type in under 2 minutes
If you want the shortest route to how to stop pop up ads on pc, use this quick checklist and pick the matching fix.
- You see a site name like “news-something.com” in the toast → it’s almost always browser notifications you allowed.
- Pop-ups happen only when visiting a specific site → block pop-ups/redirects and clear site permissions.
- Pop-ups happen after installing “free” software → check installed apps and run a malware/PUA scan.
- Ads look like Windows tips or recommendations → adjust Windows 11 notification and privacy settings.
- Your search engine/homepage changed → extension or PUA issue, review add-ons and reset browser settings.
If more than one bullet fits, that’s common. Many PCs have a browser permission problem plus a noisy app.
Turn off browser notification ads (the #1 cause)
This is the fix that surprises people: a lot of “pop-ups” are not pop-ups at all, they’re push notifications from websites you clicked “Allow” on.
Google Chrome: remove shady notification permissions
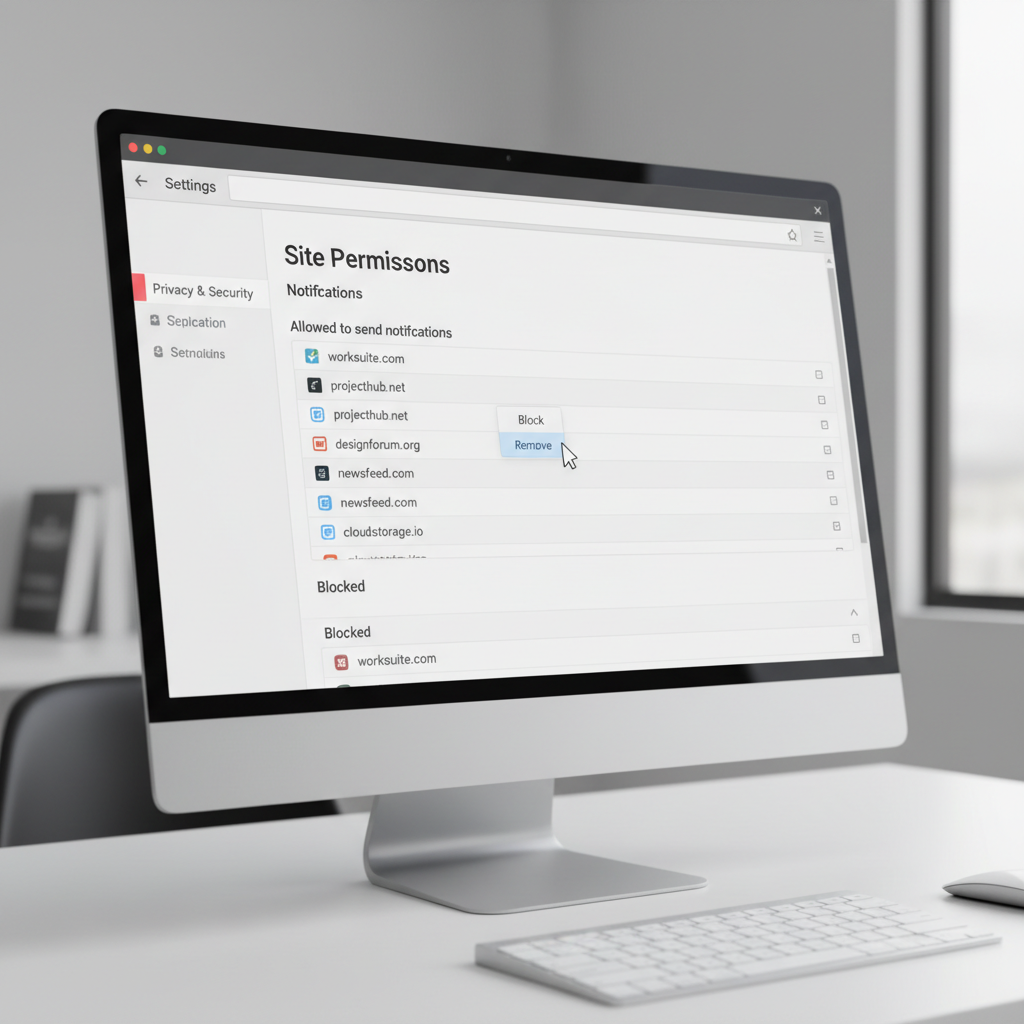
- Open Chrome → Settings → Privacy and security → Site settings → Notifications.
- Under “Allowed to send notifications,” remove or block any site you don’t recognize.
- Turn on Don’t allow sites to send notifications if you never use this feature.
Tip: if you’re unsure about a domain, block it. Legit sites still work without notifications.
Microsoft Edge: block notification spam and tighten permissions
- Open Edge → Settings → Cookies and site permissions → Notifications.
- Remove suspicious sites from “Allow.”
- Enable Quiet notification requests to stop the constant “Allow/Block” prompts.
Stop pop-ups, redirects, and shady overlays inside the browser
Once notification permissions are cleaned up, tackle classic in-browser pop-ups and redirect chains. This matters because some ad networks try to bounce you through multiple pages until something sticks.
Enable built-in pop-up and redirect protection
- Chrome: Settings → Privacy and security → Site settings → Pop-ups and redirects → set to Block.
- Edge: Settings → Cookies and site permissions → Pop-ups and redirects → set to Block.
Clear site data for the “problem” domain
If one website triggers the mess, don’t nuke everything. Clear that site’s cookies and permissions first.
- In Chrome/Edge, click the lock icon near the address bar → Site settings.
- Reset permissions, then clear site data for that domain.
According to Google’s Chrome Help, resetting site permissions and clearing browsing data can resolve persistent unwanted behaviors caused by stored site settings.
Windows 11 settings that reduce promotional toasts
Some pop-up ads are Windows notifications that feel like ads because they effectively are. These settings won’t break your PC, they just reduce noise.
Turn off suggestions and “welcome” experiences
- Settings → System → Notifications → Additional settings.
- Disable items like “Show the Windows welcome experience…” and “Get tips and suggestions…” (wording can vary by build).
Disable notifications from specific apps
- Settings → System → Notifications.
- Scroll to “Notifications from apps and other senders.”
- Toggle off anything you don’t use or anything promotional (shopping apps, game launchers, OEM utilities).
Remove adware and suspicious apps (when settings aren’t enough)
If you’re still searching how to stop pop up ads on pc after fixing browser permissions, assume there’s an installed component pushing ads or changing browser behavior.
Uninstall suspicious programs
- Settings → Apps → Installed apps.
- Sort by date installed, look for items you don’t remember adding around the time ads started.
- Uninstall cautiously: if you’re unsure, search the app name first, or leave it and scan for PUA.
Run Windows Security scans (and enable PUA blocking)
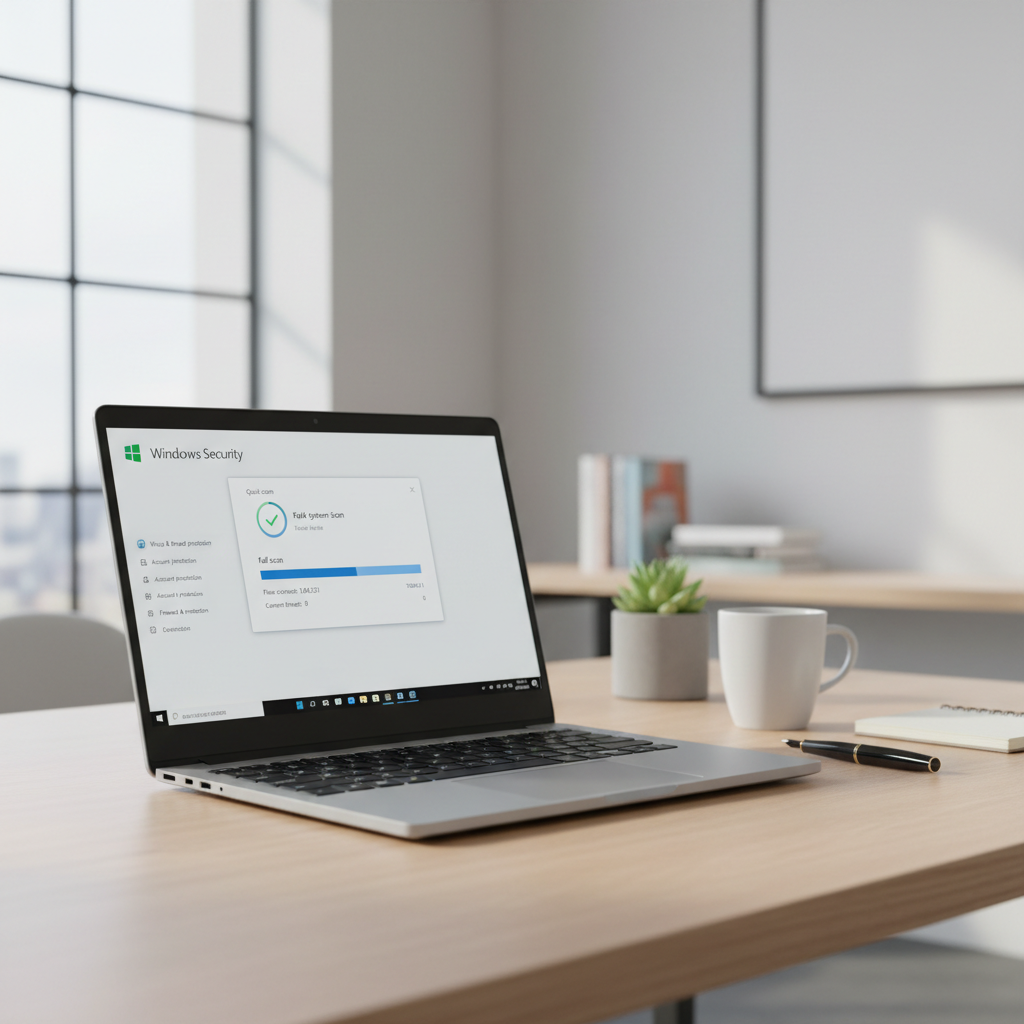
- Open Windows Security → Virus & threat protection → Scan options → run a Full scan.
- In Windows Security → App & browser control → Reputation-based protection, turn on Potentially unwanted app blocking when available.
According to Microsoft Support, potentially unwanted applications can impact browsing and device performance, and Windows can help detect and block them in many cases.
Fix browser extensions and reset settings (without overdoing it)
Extensions are a frequent cause of repeated ads, coupon pop-ups, and redirect behavior. One bad add-on can undo every other fix.
Audit extensions like you mean it
- Remove anything you don’t recognize, don’t actively use, or that promises “free deals,” “search,” “PDF,” or “security” but behaves oddly.
- Keep an eye on extensions with broad permissions like “Read and change all your data on all websites.”
If you need to be conservative, disable everything, test for a day, then re-enable one by one.
When to use a browser reset
A reset can help when the homepage, search engine, or new-tab behavior keeps changing back. It’s not always necessary, but it’s a clean line in the sand.
- Chrome: Settings → Reset settings → Restore settings to their original defaults.
- Edge: Settings → Reset settings → Restore settings to their default values.
Action plan: what to do in what order (with a simple table)
If you want a practical sequence, follow this order. It’s the fastest path for most Windows 11 machines, and it avoids “wipe everything” advice.
| Symptom you see | Most likely cause | Do this first | If it persists |
|---|---|---|---|
| Pop-ups in bottom-right with a website name | Browser notifications allowed | Remove notification permissions in Chrome/Edge | Check Windows notifications + run PUA scan |
| New tabs and redirects while browsing | Pop-ups/redirect setting or extension | Block pop-ups/redirects + review extensions | Reset browser settings |
| Ads start after installing free software | Bundled adware/PUA | Uninstall suspicious apps | Full scan in Windows Security |
| Promotional Windows toasts from apps | Noisy app notifications | Disable per-app notifications | Uninstall the app if not needed |
Key takeaways and common mistakes to avoid
- Don’t click “Allow” on random notification prompts, even if the site claims it’s required to view content.
- Don’t install multiple “PC cleaners” hoping one will fix it; overlapping tools can cause conflicts and confusion.
- Don’t ignore extensions, especially anything installed “just for a moment.” Those moments tend to linger.
- Don’t wipe all browsing data blindly if one site is the issue, clear that domain first.
If you’re dealing with fake “Your PC is infected” alerts that push a phone number or demand payment, treat them as scams. Close the tab, avoid calling, and consider a security scan.
Conclusion: a realistic way to keep pop-ups from coming back
Most of the time, how to stop pop up ads on pc on Windows 11 is a permissions cleanup plus a quick extension and PUA check, not a total reinstall.
If you do only two things today, make them these: remove website notification permissions you don’t trust, then run a Windows Security full scan with PUA blocking enabled if available. That combo handles a big chunk of real-world cases without much hassle.
If you want, keep a short “no new extensions” rule for a week and see if things stay quiet, it’s a simple way to spot what triggers the problem.