
How to check graphics card windows 11 is usually a two-minute task, but it matters because the “right” method depends on what you’re trying to confirm: the GPU name, whether you have integrated vs. dedicated graphics, or the exact driver version.
If a game refuses to launch, a creative app complains about VRAM, or your laptop battery drains fast, knowing which graphics card Windows 11 is actually using helps you troubleshoot without guessing. It also keeps you from downloading the wrong driver, which is a common, time-wasting mistake.

This guide walks through the fastest built-in checks first, then the deeper options when you need details like VRAM, DirectX support, or which GPU a specific app is assigned to.
Quick answer: the fastest ways to see your GPU
If you just need the graphics card model, these are the quickest places most people check.
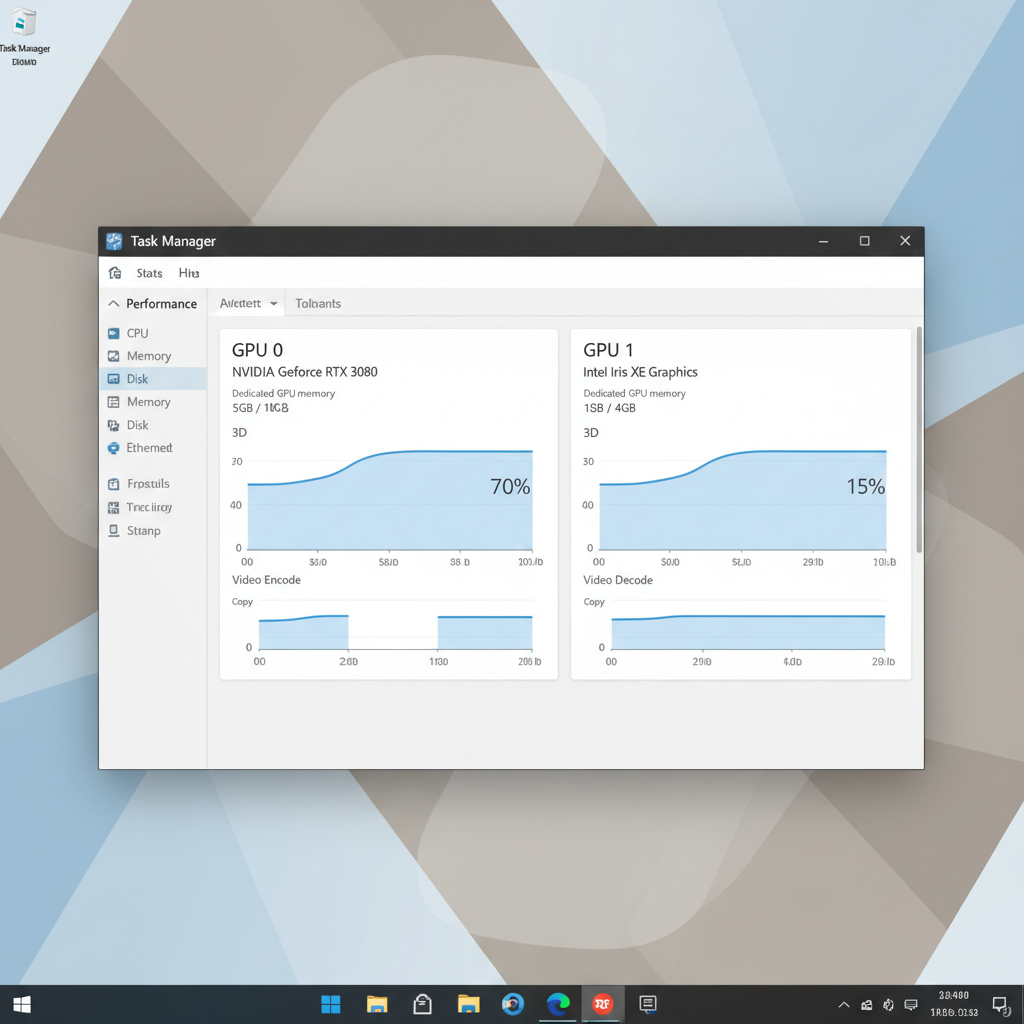
- Task Manager: best for seeing which GPU is active right now and how busy it is.
- Settings: best for confirming which GPU an app should use (power saving vs. high performance).
- Device Manager: best for confirming the installed display adapters and basic driver info.
For many “what GPU do I have?” situations, Task Manager or Device Manager is enough. For driver troubleshooting, you’ll usually want DxDiag or the vendor tool.
Check graphics card in Task Manager (best for real-time use)
Task Manager is practical because it shows GPU utilization in real time, so you can see whether your dedicated GPU is actually doing the work.
Steps
- Press Ctrl + Shift + Esc to open Task Manager.
- If it opens in compact view, click More details.
- Open the Performance tab.
- Select GPU 0, GPU 1, etc. The right panel shows the GPU name and activity.
Tip: If you see two entries (for example, Intel UHD + NVIDIA GeForce), you have integrated graphics plus a dedicated GPU. Laptops commonly show both.
If you’re diagnosing lag, keep Task Manager open while launching the game or app. If the dedicated GPU stays near 0% while the integrated GPU spikes, that’s a strong clue Windows assigned the app to the wrong GPU profile.
Check graphics card in Settings (best for app-to-GPU assignment)
Settings won’t always show every technical detail, but it’s the cleanest way to confirm which GPU Windows 11 prefers for specific apps.
Steps (Windows 11)
- Open Settings → System → Display.
- Scroll to Graphics (sometimes labeled Graphics settings).
- Select an app (or add one), click Options.
- Choose Power saving (often integrated) or High performance (often dedicated), then Save.
Many “my GPU isn’t being used” complaints are really app-level assignment issues. This panel is where you fix that without touching BIOS settings.
Check graphics card in Device Manager (best for identifying installed adapters)
Device Manager is simple and reliable for a quick ID, especially if you suspect a driver problem or you’re seeing “Microsoft Basic Display Adapter.”
Steps
- Right-click Start → Device Manager.
- Expand Display adapters.
- You’ll see one or more GPUs listed. Double-click to view Driver details.
If you see Microsoft Basic Display Adapter, Windows is running a generic driver. That often happens after a fresh install, a failed update, or when the correct driver is missing.
Go deeper with DxDiag (DirectX + driver version in one place)
DxDiag is a built-in diagnostic that’s great when a game asks for DirectX details or when support asks you to “send your DxDiag.” According to Microsoft, DirectX Diagnostic Tool helps you view and troubleshoot DirectX-related components.
Steps
- Press Win + R, type dxdiag, press Enter.
- Open the Display tab (or Render tab on some systems).
- Look for Name, Manufacturer, Display Memory (VRAM), and Driver Version.
This is also a clean way to verify which GPU Windows is reporting to legacy apps that don’t read modern APIs well.
Command-line check (when you need a quick text result)
If you’re remoting into a PC, documenting inventory, or troubleshooting without clicking around, command-line tools are handy.
Option A: WMIC (may be limited on newer Windows builds)
- Open Command Prompt.
- Run: wmic path win32_videocontroller get name
Option B: PowerShell (more flexible)
- Open PowerShell.
- Run: Get-CimInstance Win32_VideoController | Select-Object Name, DriverVersion
If the output shows multiple GPUs, that’s normal on many laptops and some desktops. What matters is which GPU your workload actually uses.
Which method should you use? (comparison table)
Different tools answer slightly different questions. Here’s the quick map.
| Method | Best for | What you’ll see | When it can mislead |
|---|---|---|---|
| Task Manager | Confirming active GPU | GPU name, utilization, VRAM usage | Some apps show low usage if they’re CPU-bound |
| Settings → Graphics | Assigning GPU per app | Power saving vs high performance choice | Doesn’t prove the app will always obey (rare cases) |
| Device Manager | Installed adapter identification | GPU list, driver provider/date | Generic adapter appears if driver missing |
| DxDiag | Driver + DirectX details | VRAM, driver version, feature support | May show the “display” path rather than compute GPU |
| PowerShell | Remote/automation | Model + driver text output | Less friendly for casual checks |

Practical troubleshooting: what to do with what you find
Once you know the GPU model and which one is active, the next move depends on the symptom. A few common scenarios show up again and again.
If your PC shows two GPUs and games run on the wrong one
- Use Settings → System → Display → Graphics to set the game to High performance.
- Reboot once, then re-check in Task Manager while the game runs.
- If you use an external monitor on a laptop, plug into the port that’s wired to the dedicated GPU (varies by model).
If Device Manager shows “Microsoft Basic Display Adapter”
- Run Windows Update and install optional driver updates if offered.
- Download the correct driver from your GPU vendor (NVIDIA/AMD/Intel) or your laptop maker for OEM-tuned builds.
- If the screen flickers during installation, that can be normal; if it loops or crashes, roll back in Device Manager.
If an app complains about VRAM or feature level
- Confirm VRAM in DxDiag and compare with the app’s requirements.
- Make sure the app is assigned to the dedicated GPU where applicable.
- Close overlays and browser tabs that can consume GPU memory during heavy workloads.
Key takeaways (save yourself time)
- Task Manager answers “which GPU is working right now?” better than most tools.
- DxDiag is your friend when you need driver version, VRAM, and DirectX details in one view.
- If Windows 11 shows Microsoft Basic Display Adapter, treat it as a driver install problem until proven otherwise.
- For laptops with dual graphics, app assignment in Graphics settings often fixes performance surprises.
Conclusion: the simplest workflow that works for most people
If you want a dependable routine, start with Task Manager to see which GPU is active, then use DxDiag to capture the driver version and VRAM, and only then adjust app preferences in Settings if something is using the “wrong” GPU. That sequence keeps you from chasing drivers when the real issue is assignment.
If you’re still unsure after you check graphics card Windows 11 tools and the system behaves oddly, it may point to a deeper driver conflict, Windows update issue, or (less commonly) hardware trouble, in those cases, consider reaching out to your PC manufacturer support or a qualified technician.
Action step: pick one method from this guide and check your GPU name and driver version today, you’ll thank yourself the next time a game or app asks for specs.